So, you’re here because you want to succeed in using Pinterest for Business.
And you most likely have a product or service you’d like help marketing. But you’re just not sure where to start or how to do it? Read on… it’s easier than you think 🙂
Watch this tutorial video and learn how to create your own Facebook Meme, how to create really cool YouTube overlay images, and what you can do with the built in GRID feature in The Logo Creator!
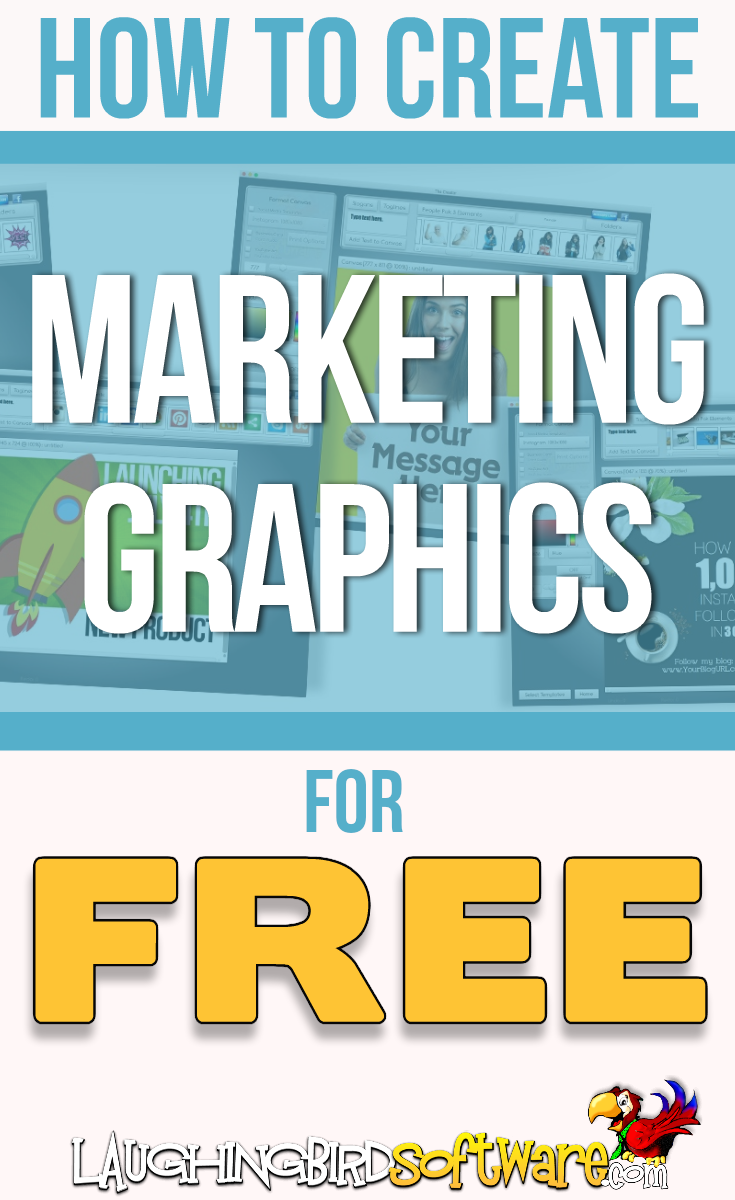
A huge challenge for your business is getting easy marketing graphics that are professional but affordable.
Learn how to create your own easy marketing graphics right now… even if you’re NOT a graphic designer and don’t have time (or money) to learn complicated design techniques!
Just read this step-by-step tutorial to find out how you can have the business graphics you need, all of the time.
In just six, follow-along steps, you can learn how to make a graphic for an advertisement, blog, website, social media, etc!
From the pull-down menu on the left, click on the “Select a Template Set” menu.
Now that you’ve selected a design template, you may want to re-size the canvas, depending on what type of graphic design you need.
After selecting your first template, start by clicking on “Format Canvas”. Here you can re-size the canvas (making your overall image bigger or smaller) and change the background color.
Keep reading to learn how to use The Graphics Creator’s “color picker” tool.
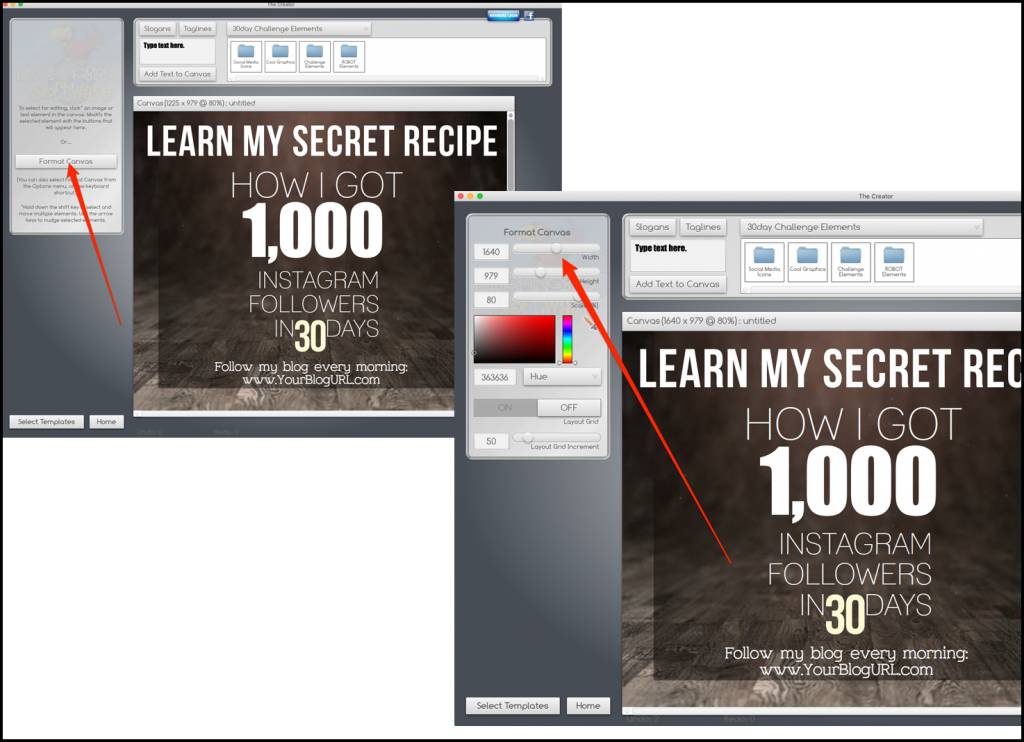
In the above example of an Instagram-sized marketing graphic, the canvas is 1080 X 1080, fitting Instagram’s standard size perfectly.
However, you might want to use a variety of sizes for various marketing graphics throughout your content.
(get the full suite of Social Media templates with our newly launched Social Media Template set!)
At any time, click on an image or element on your canvas to “highlight” it.
Then you’ll see the “Image Menu” on the top left. Each button leads to a menu of sliders that will modify your image.
For example, if you click on “Image Format”, you’ll be able to adjust the opacity (aka “Transparency”), the size (“Image Scale”), and the angle of each object (just play around a bit to get the hang of it).
By choosing “Image Color”, you’ll be able to “Colorize” and make a “Gradient” of color.
And check out the awesome “color picker” tool that makes it easy to keep colors consistent. Here’s how it works:
Click “Colorize”. Then, highlight (click) the object you wish to change color. Next, click on the small “pen” tool to the right of the color choices.
Now, go to your canvas, drag the pen to any color you’d like to match, click once, and then move the pen to the object you’d like that color given to and click once. Once you have the image colored as you wish, make sure to click once more on the color pen to turn it off!
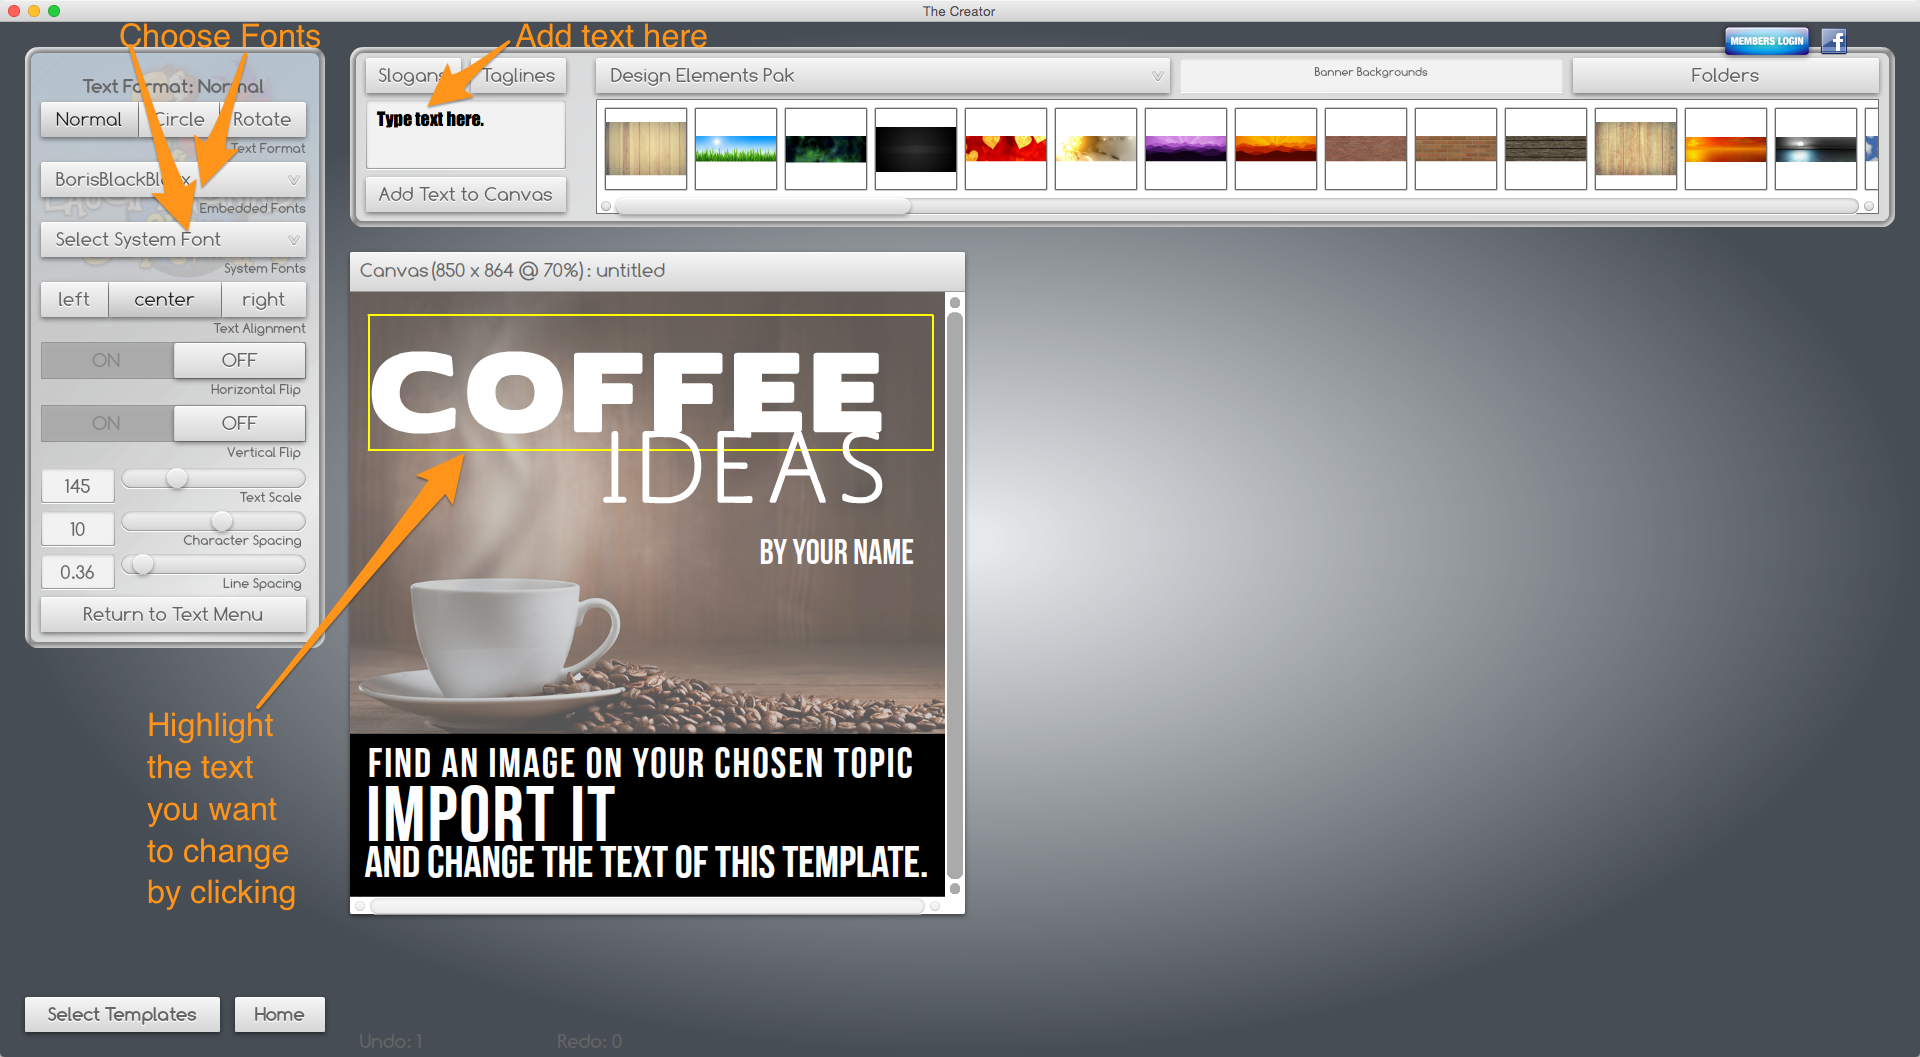
The text menu works the same as the image menu. Simply alter the text by clicking to highlight the text you want to change. The menu on the left will change to “Text Menu”. As you will see, there are several options on how to modify the text.
Click “Edit” if you simply wish to re-write the text. Re-write the text in the box and hit “Implement”. Only the highlighted text will change. You can also change fonts by clicking “Format” and selecting from numerous fonts in the pull-down menu.
Now, perhaps, you’d like to add another line of text. Look for the small box to the right of the Text Menu. Type in your text and click “Add Text to Canvas”. Click and drag the text to place it. Then modify it in the same way as above.
The “text color” button can be used in the same way as for an object. You can change the color of your text, as well as add an outline, blur, or shadow. Tip: Using the shadow feature is a great way to emphasize your text instead of outlining it.
There are a ton of objects, swooshes, and design elements to help make easy marketing graphics. However, there may still be times you wish to import a specific image. And, you can easily resize imported images to fit your canvas!
Here’s how to import an image: Go to the “File” menu for The Graphics Creator software at the top of your screen and select “Import PNG or JPG”. Double-click on your image (from your own folder or desktop) and it’ll magically appear on the canvas!
To finish your marketing graphic, easily move, re-size and modify just like you would any image or object already included in The Graphics Creator.
Once your design has been completed, go to the “File” menu and choose “Export JPG” (or PNG).
That’s how to make easy marketing graphics!
Now you’re ready to create every online graphic you need… for your blog, social media, website, advertisements, or emails. Get more professional templates created for exactly what you need: eCovers, social media graphics, animated presentations, logos, and more.
Want more help or design inspiration? Join Laughingbird’s private Facebook group.
Haven’t gotten your Free Design software yet?